Build a reverse ssh tunnel reverse proxy for (not) fun and (not) profit
published
A few years ago, a team I was part of was working on vivi, our master thesis’s project. You can read more about it in the link above if you’d like, but the gist of it is; we were trying to build a solution to handle internet traffic and routing for ephemeral events (think something like comic-con etc) with lots of features and a user interface non-technical users could use and understand.
Where does a reverse ssh tunnel reverse proxy fit into this
Context
When the time came to built the box that would live between the router and the rest of the network, we went (al least for the POC - proof of concept) with a RaspberryPi 4. We tried different solutions to handle communications between our backend server and all the machines, including using balena os - which would have worked fine had we not needed to work with the network stack of the device.
Build it yourself
So that’s why we ended up building this kind of Frankenstein monster of a service. We needed a way to remotely connect to the device to check its status and perform maintenance operations (i.e. reboots, firmware updates etc). And before you ask:
couldn’t you have just used the ip address of the machine or exposed a port on the network to connect to it?
NAT and local ip addresses
Fasterthanlime has an excellent video describing how the internet works, you should check it out
A (forward) ssh tunnel
A normal (or forward) SSH tunnel allows you to securely access a remote service over an encrypted SSH connection.
For example, let’s say you want to access a web service running on a remote server’s port 8000, but that port is blocked by a firewall. You can create an SSH tunnel by connecting to the remote server (assuming port 22 is open) and forwarding a local port, say 9000, to the remote port 8000: you can run the command:
ssh -L 9000:localhost:8000 user@remote_server
with this command, you can then open the address localhost:9000 and the request will then be forwarded to the remote machine’s ssh port and then finally reach the destination port (8000 in this case). This is also called Tcp Forwarding.
Let’s reverse that
Now, what happens if the machine I need to connect to is behind a firewall and/or a NAT? It would most likely not work because:
- I don’t know the machine’s actual IP address
- I cannot (usually) initiate a connection from outside the local network without an exposed port or something similar
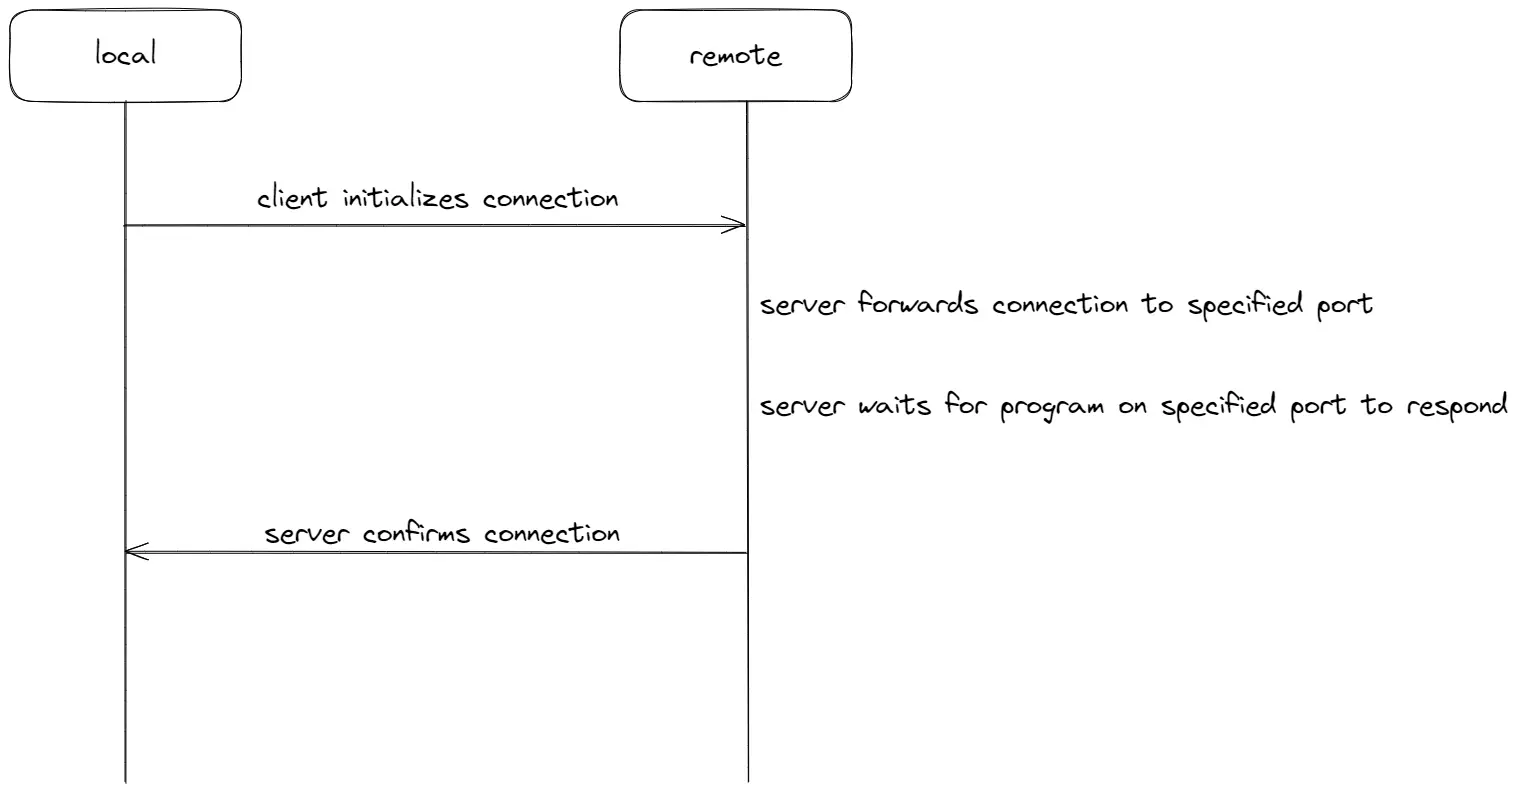
And so, enters the reverse ssh tunnel. A reverse ssh tunnel is based on the same principle as the normal ssh tunnel, except it contains an additional step, with the remote machine using the initial connection from the other host to create a new “tunnel” toward the initiating machine. This allows to bypass the issues with firewalls and NATs listed above.
For example, to tunnel the SSH port (22) of a remote machine to port 8022 on your local machine, the command would be:
ssh -R 8022:localhost:22 user@local_host -N
How we built it (attention: do not try this at home, there are easier ways to do this)
There are a couple of part to this setup:
- The http server onboard each device
- The systemd service responsible for the ssh tunnel on each device
- The Server handling all of these connections and all the reverse proxy logic
Http Server
The Http server is the API we built to manage the device; it allowed us to remotely restart the device, update the dependencies, retrieve its logs etc…
It was a simple NestJS application.
Systemd Service
The systemd service was responsible for receiving a port from the server and configuring the reverse ssh-tunnel to connect to said port.
Remote Server
The remote server was the one receiving all the connections and handling the domain name registration for each device and its corresponding reverse proxy configuration.
The code is available here if you want to take a look at it (though I would not recommend it)
The steps were:
- A device would upload its ssh public key to the remote server
- The remote server would then generate an nginx config and associate a domain name to a port number
- The port number would be sent to the device to configure its service
- THe connection was then started on boot
Why you shouldn’t do it this way
The main issue with the way we did this is security; there really is no central authority managing this.
- The device uploads its ssh key and registers itself with the server
- The server never verifies that the request it coming to a legitimate source.
- The server also doesn’t check to see if the ssh connection for a specific host is aiming for the right port
Alternatives
A simpler way to handle this, given the infrastructure requirements, would probably have been a mesh vpn like tailscale or zerotier - or even plain old wireguard. This would still allow all reverse proxy goodies, but would provide a central authority to handle authentication (the server provides and checks for correct credentials on a new connection).
Really, a vpn would probably have simplified a lot of things for this use case

